Laser Engraving Multiple Objects
When I was still new in the engraving industry, I received an order of engraving 200 smartphones. I spent a long time engraving because I was putting one phone at a time in the laser machine. I wasted a lot of time unnecessarily and made the client get tired of waiting. Why? I had not yet learned the tricks of laser engraving multiple objects.
I know there are engravers out there with the same challenges I had. If you’re one of them, this post will save you a lot of time. There is no reason why you put one item at a time and engrave one by one. It’s convenient and time-saving to put several things so that you etch them at once and in the shortest time.
Laser Engraving Multiple Objects Has Several Advantages
Benefits of Laser Engraving Multiple Objects
Before getting into the tricks I use, let me first share with you the advantage of laser engraving multiple objects. They include the following:
#1 – Saving time
The first benefit you get is saving time. When you engrave one item at a time, you waste a lot of time. The time you spend to put the thing into the laser machine and to remove it after engraving it is much. And in engraving, time is money.
#2 – Reduce the engraving cost
The more time you spend running the machines you use in the engraving (i.e. laser machine, extractor fan, and air compressor), the more money you will spend on power consumption. The time you spend reduces your profitability. But by laser engraving multiple objects, you cut down on these unnecessary costs.
#3 – Increase your productivity
Engraving one object at a time reduces your productivity. For instance, when you spend more time on one single job in a day, it makes you postpone working on other customers’ work. But laser engraving multiple objects will lead you to improved productivity.
#4 – Serve your customers satisfactorily
When customers come with their items to be engraved, and you spend less time, they feel good. Minding about time leads to customer satisfaction, which is very beneficial to your business.
#5 – Saving energy
You lose a lot of energy and get tired of nothing when you engrave one item at a time because of the burden of putting and removing them from the machine. But when you lay out several pieces and laser engrave them once, you save your energy.
Discover 4 Tricks of Laser Engraving Multiple Objects!
To expertly laser engrave multiple objects, use the following tricks.
First Trick: Create Target Shapes
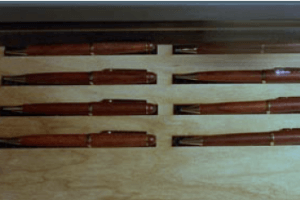
Target Shapes
Let us say that you have 100 smartphones you want to engrave with serialised identification numbers at the back of each of them. And the client wants you to put the numbers in a specific place inside the phones.
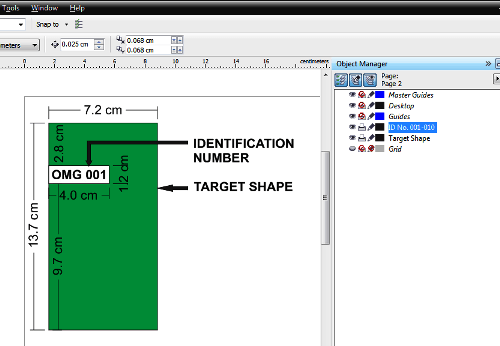
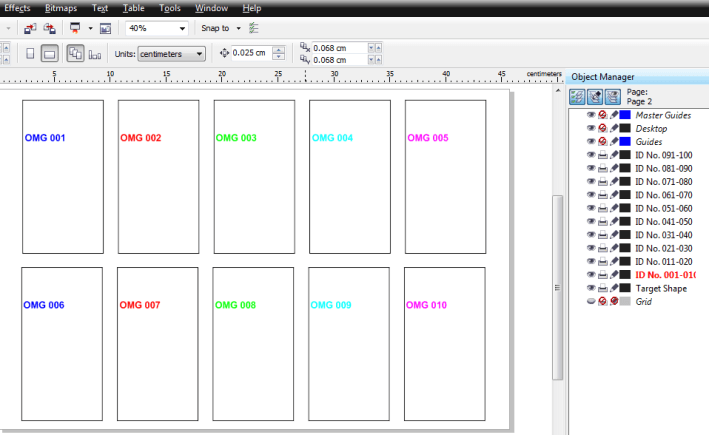
What you do is measure the size of the phone accurately to create a target shape. Let us assume that the phone size is 7.2 cm by 13.7 cm. So your target shape will be of that size, and you have to draw it in the vector or cutting mode. Draw it in your designing program, i.e. CorelDraw as in the image above.
After drawing the target shape, then measure the exact location of the area where you’re going to engrave the identification number in the target shape. Place the identification number or design in the target shape.
Second Trick: Layout your Artwork in Layers
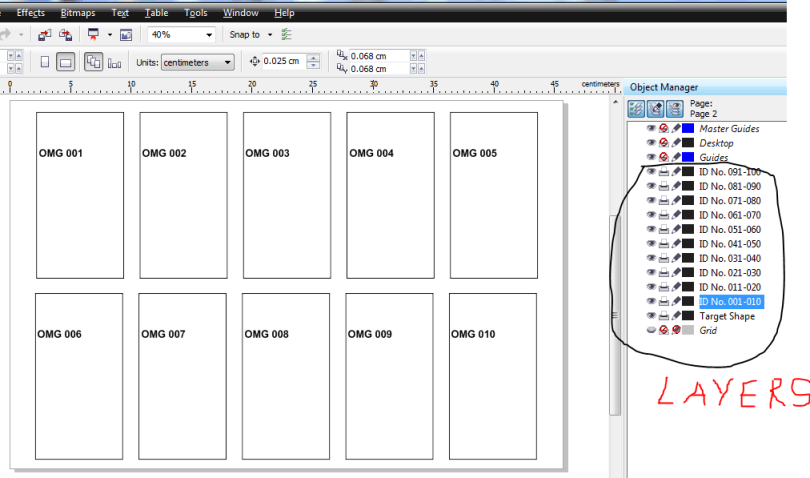
Using Layers
When you’re drawing the target shape, place it on one layer and the identification number on the second layer. And because you’re going to engrave 100 phones, you have to create other layers to cover all the 100 phones each with a different serial identification number. It makes it easier for you to hide some layers as you print with your laser what is on a single layer.
After placing the target shape on one layer and the design on another layer, select the two items and duplicate them to make as many copies as you can fit in the space of your engraving area. In our example, we have repeated both the ID number and target shape nine times to come up with a total of 10 phone target locations that are enough with an engraving area of 18 inches by 12 inches.
Then copy all that is on the layer with the design or identification numbers and paste it on others. The number of layers you create depends on the number of objects you are going to engrave. For our case, we have created ten layers of 10 phones each, and we have given each phone its own serialised ID. Because each phone has its unique identification number, you’ve to change the serial numbers first on each layer before proceeding on.
Third Trick: Use Color Mapping
Colour Mapping Property
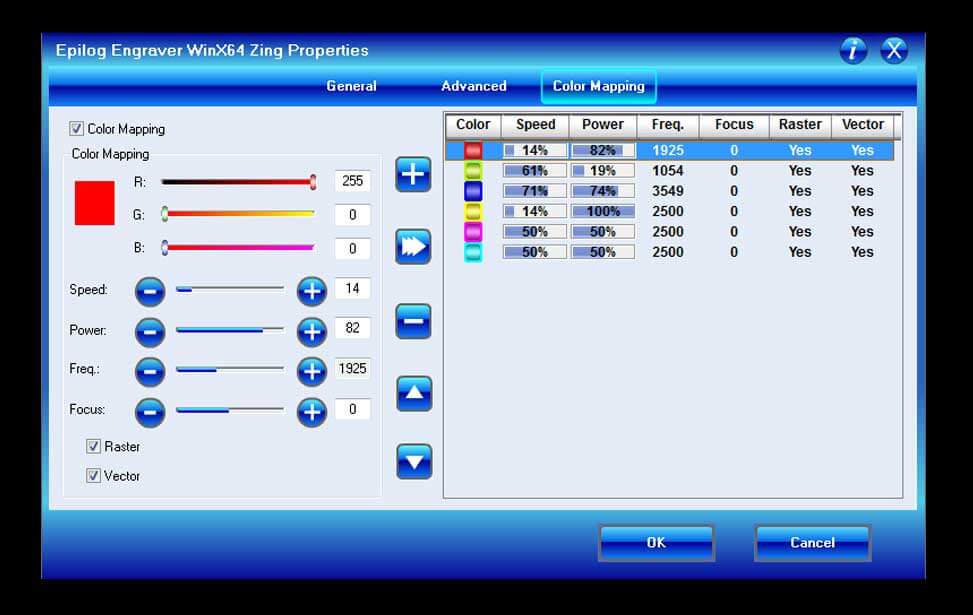
Sorry if you’re using brands other than Epilog because it’s only Epilog laser engraving systems with the colour mapping feature. Next time you plan to buy a laser system, consider buying from Epilog to enjoy this excellent function.
The colour mapping feature helps to quickly set up your designs for faster run time and more precise engraving. This feature allows you to assign different speed, power and frequency settings to different colours in your design. The colour mapping dictates where and when to engrave or cut.
Colour Mapping
For instance, in our phone engraving job, we are going to engrave ten phones on each layer. If you don’t use colour mapping, the machine head is going to move from the extreme left to the absolute right of your engraving area. By so doing, it will be covering even the spaces without anything to engrave. It consumes more time. And remember that time is money in engraving.
But with colour mapping, the head will engrave the object following a particular colour and in the order of your settings in the colour mapping property. By so doing, the laser will skip empty spaces and only engrave where you have the design. The colour mapping function is, therefore, a great way of saving time when laser engraving multiple objects.
Fourth Trick: Create a Fixture
You have to use a fixture when laser engraving multiple objects. The concept behind creating an engraving fixture is to give you a perfect engraving position guide so that you can place the items you’re going to engrave in the exact spot on the engraving table. You can laser cut this fixture from any materials such as cardboard, plywood, acrylic sheets, and many others.
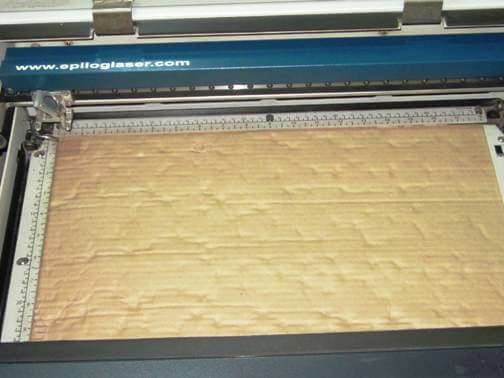
Fixture Material
Get the material for making your engraving fixture, cut it to the size of your laser bed, and place it in your laser engraving machine underneath your rulers so that it does not move in the process of running your jobs. Make sure that only the layer with your target shapes is set to print. It’s good to turn off the other layers from view so that you don’t see them because we don’t need them at this stage (refer to the image below).
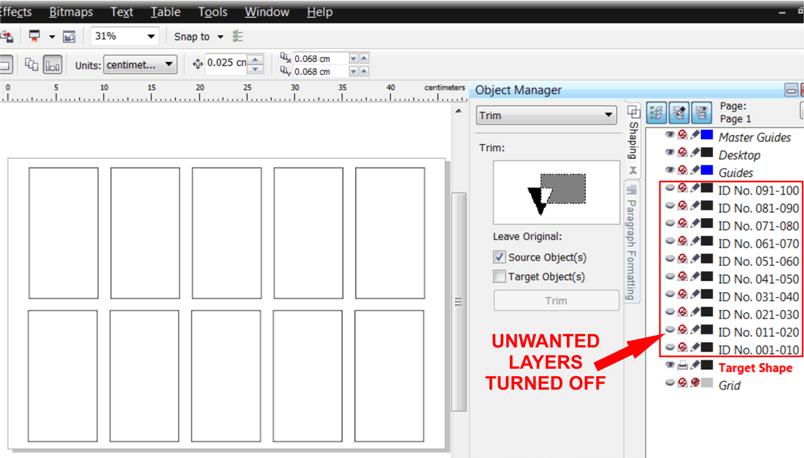
Unwanted Layers Turned Off
Having set the job for printing, send it to the laser to cut the target shapes into the material to create a grid that matches the one in your designing program. Remove the cut pieces from the fixture to create open spaces for positioning the objects you’re going to engrave.
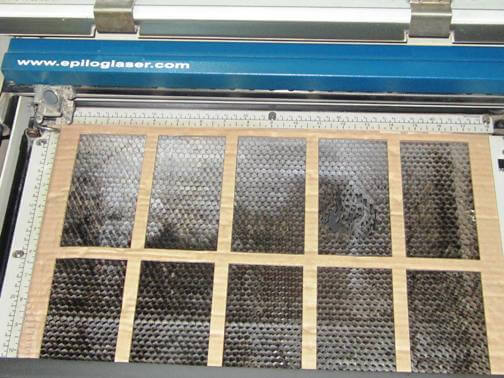
Cut Pieces Removed
Having removed the cut pieces, now place your objects (or phones in this tutorial) and begin engraving them. Do not forget to refocus the lens on top of the objects you’re going to laser engrave. Secondly, turn off the layers with the artwork that you’re not etching. That’s all you’ve to do when laser engraving multiple objects.
Conclusion
If you want to save time and increase your productivity, equipping yourself with tricks of laser engraving multiple objects in the shortest time will help you to achieve it.
Do you have other tricks you know to share with us? Use the comment section to share your time-saving tricks with us!


0 Comments